Late Summer Treats


We’ve been gathering fruity riches this month: apples, grapes, pears, oh my! It is a very prosperous fruit year. Melons, jalapenos and fish peppers, as well as green beans, are also doing well this year.

Here we have some of the treats I’ve made this August: green tomato & cheese Dutch baby, strawberry-pear cobbler, and apple cake with a sweet hummus frosting.

For the Dutch baby, I sliced green tomatoes and placed them in the cast iron skilled with butter & oregano to pre-cook in a 415 F oven for 5 minutes. I added chunks of mozzarella to the egg/milk/flour batter and poured it over the tomato/butter skillet and quickly returned to the oven for 20 minutes. Squeeze a fresh lemon wedge over the pancake before serving.

For the cobbler, I pressed a shortbread crust into the bottom of a pan, topped with a mixture of strawberry chunks, thinly sliced pears, & sugar, and then crumbled some shortbread on top, streusel-style. Baked in a 375 F oven til firm.

For the apple cake, I diced our homegrown apples and mixed them into a VGF cake batter with buckwheat flour, cinnamon, fresh ginger, nutmeg, a pinch of cloves, a splash of apple cider vinegar, oil, sugar, molasses, and baking powder. While it baked for a good 35 minutes at 350 F, I made the frosting in our powerful new food processor. Chickpeas (cooked soft or from a can), tahini, vanilla, applesauce, and confectioners’ sugar, blended until ultra-smooth. Once the cake cooled, I spread the sweet hummus on top, then sprinkled with cinnamon & fresh apple slices. Some folks are unsure about the “sweet hummus” at first, but are sold at first taste – no garlic of course! It tastes reminiscent of halva, a sweet tahini treat.


Peanut Butter Bars

It’s kind of funny how certain dishes become favorites/standards. I’ve spent the past 10 + years cooking at this 100-person farm community, have cooked a wide variety of dishes with varying popularity, from gnocchi to raw VGF dressings and everything in between. My usual back-up list of dishes that are easy to fill in an empty slot at a meal includes mac & cheese, lentils, spiced rice, spiced molasses cake, baked potatoes, garlic bread, salads, and of course whichever veggies are in seasonal abundance. But it wasn’t until this year that I developed a recipe that seems to have become a popular staple here, that could get made fresh and eaten up each day, that’s also easy enough to make with cheap enough ingredients. I started making these peanut bars as an easy grab-and-go snack that’s also semi-nutritious, with protein and not super sweet, and even sneak some whole grains in there. Something quickly accessible to our busy farmers and factory workers, since we supply lots of ingredients & leftovers, but not so many ready snacks. There’s homemade granola, bread, yogurt, and things that require bowls. This treat may not be from the garden, but it’s homemade & well-loved. Now I make this recipe (which fills our largest sheet pan) a couple times a week, and they all get gobbled up.

I use organic peanut butter (smooth or crunchy) from our friends at East Wind Nut Butters in Missouri. They also make a delicious “mystery butter,” with part cashew, part almond butter and sometimes a hint of tahini – that worked well when I tried it in this recipe once, so if you don’t eat peanuts, feel free to substitute any nut butter. Peanuts and sunflower seeds, easily grown domestically, are cheaper, more sustainable nuts than almonds, cashews, or the like. As much as I love almonds and cashews, they take tons of water to grow, are often imported, and take more labor to process.

For the flax preparation, an egg replacer, I grind flax seeds and mix them into a cup of water and microwave it for 45 seconds, stir, and repeat twice until it’s boiling and bubbling and thickened to an egg-like consistency (it may thicken slightly while cooling). I do this in a larger cup than necessary, say a pint measuring cup, because it likes to boil over sometimes. You could also boil a kettle of water, and pour the water over the ground flax, stir, and let sit for a few minutes, but it doesn’t quite thicken the same.

For sweetener, I usually use fake maple syrup, which still disappoints the Vermonter in me. I would love to use real maple syrup instead of the mostly-corn-syrup stuff, but it is cost-prohibitive, especially in the South. Most folks outside of maple states grow up with fake maple as the norm, an exception made for corn syrup by those who usually shun it. It strikes me as less sustainable than the real stuff as well as less healthy. Personally I have a strong preference for the taste of real maple, having grown up with it dripping just a few feet from my house. It’s expensive in Vermont too, but there it is often an exception item in people’s budgets, the quality and locality is valued, sometimes neighbors trade maple for other items, a natural bartering gold. Honey works well for this recipe, but is also expensive – same with agave, which is imported. Our farm also trades with Sandhill Community for sorghum, which is like a dark honey. Use whichever your sweetening preference is.

Peanut Butter Bars

4 c oats

4 c peanut butter

1/3 c molasses

4 c maple syrup (or honey, sorghum, agave, etc)

2 TB vanilla

1 tsp cinnamon

2 tsp salt

1 TB baking powder

6 cups all-purpose flour

flaxseed preparation of 4 tsp ground flaxseed with 3/4 c hot water (see above for preparation instructions)

Sift together the all-purpose flour & baking powder. Mix all other ingredients separately, then combine with flour mix. Dough/batter will be sticky. Spread it out evenly about a half an inch thick, patting with your hands (wet your hands with water or oil first, or a dusting of flour, to combat the stickiness). Bake at 350 F for 20 minutes. Allow to cool slightly for 10 minutes, then cut into bars while still warm.


IMG_3168IMG_3180IMG_3186IMG_3183IMG_3189

Springtime Dutch Pancake

I’m in love with chives this year! I’ve always liked them, but for some reason they are just shining this month. Chives chopped finely are the freshest green garnish of the season. They add a small bite, a nip of allium flavor. The tiny chive is a reminder of larger vegetables to come soon.

Some weekends growing up, my mom used to make what we called “special pancake,” which we served with Vermont maple syrup and a splash of lemon juice. I’ve also heard it called Jacob’s pancake, Dutch baby, and “failed popover.” The recipe is very simple, and similar to popovers, just two eggs, a cup of milk, a half-cup flour, and butter pre-melted in the pan while the oven’s heating up. Flavor it however you feel like, whether plain, or with thinly sliced apples & cinnamon, or shredded cheese. Today I have mixed in a handful of chives, fresh sage, one of the first yellow summer squashes, salt & pepper, and a small pinch of nutmeg. Bake for 20-25 minutes in a 400 F degree preheated oven. When it is approaching golden brown, and poofed up in random beauty, it is done. Serve immediately, or watch it deflate in a few minutes.

IMG_3205IMG_3208IMG_3210IMG_3213IMG_3216IMG_3224IMG_3223IMG_3219IMG_3228

Gluten-free Bread

20170501_120500

This week I managed to make a pretty good vegan gluten-free bread! Not an easy task. I’ve spent years experimenting with gluten-free baking, with varying success. I’ve been meaning to actually write down recipes and post them, rather than just doing things by sight/memory/improv. Hopefully I’ll get some more gluten-free recipes up soonish. I have a few gloriously gluten-less cakes in mind, like lime-coconut, lemon gel, and mocha gel. But I digress into cake territory, yet again.

20170501_12041720170501_10412720170501_101434

Here’s the dough rising for its first hour. I had to switch over to a wooden spoon at this point.

20170501_095843

The ingredients together before being whisked, clockwise from left: sunflower seed meal, yeast, flax, baking powder, olive oil, buckwheat flour, molasses, and salt.

20170501_082805

To make sunflower seed flour/meal, just grind raw sunflower seeds until powdery in a coffee/spice grinder. You could also sub out any other nut meal flour, like almond or cashew.


Vegan Gluten-Free Sunflower Seed Bread

makes 2 medium loaves

Ingredients:

4 c sunflower seed meal

3.5 c buckwheat flour

4 tsp flax seeds, ground

1.5 tsp salt

2 TB molasses

2 TB olive oil (Edit: or coconut oil or sesame oil)

1 TB yeast

3 TB baking powder

4 c warm water


Directions:

Whisk together all ingredients and let sit, covered, to rise for an hour. Switch to a wooden spoon, and give the batter/dough a good stir before allowing to rest and rise for a second hour in the bowl. Gluten-free flours, being often of hearty whole grains, benefit from longer sitting to allow the flour to absorb and fully hydrate.

Grease two medium bread pans (not used for glutenous bread). Split the dough between the pans, smoothing the tops just a bit. Let rise in the pans for 40 minutes, until just puffing above the edge of the pans. Gently place in a 350 F oven, bake for 45 minutes. Let the bread cool in the pans for 15 minutes after removing from the oven. Use a butter knife to run along the sides of the pans, then dump the loaves out onto a cutting board. They may need a couple of taps to pop out.

Then, a golden crust. A strong crumb that holds together. A tasty, toasty, nutty flavor that is yeasty like bread, and otherworldly delicious! Whether you’re gluten-free or you have gluten-free friends, a loaf like this, steaming from the oven, is a sight (and taste, and smell) to behold.

Sure, the peculiar taste of buckwheat isn’t for everyone, I just happen to be a lifelong fan of it. Buckwheat is high in magnesium, a natural muscle relaxant. Mixed with the extra protein of the sunflower seeds, a wonderful nuttiness comes out strong, if you enjoy that like I do.

Today I also attempted another VGF bread made from red lentils and rice flour. It was less picturesque, although a pleasant dusty sunset color, and tasted great flavored with basil & rosemary. But that is a bread for another day.


Bean Salad with Chard & Chives

We have lots of lovely rainbow chard brightening our plates this week. Kale and spinach too, which all seems to go down with a bit more enthusiasm when combined with various forms of garlic. Fresh green garlic chives and scallions are in great shape this spring, a flavorful garnish for pretty much anything. Lately I’ve been favoring this cold white navy bean salad with chives, chard, fresh lemony sorrel, parsley, olive oil, lemon juice (a bit of zest would add oomph), salt & white pepper. I chop up the rainbow chard stems like celery, a colorful crunch, then slice the greens up finely. This is a refreshing way to use up some of the abundant greens this spring.

20170417_10315620170417_10545920170417_11111520170417_111141

The Many Faces of Tofu

At the farm, we make a lot of extra-firm tofu – it’s a business of ours, so we eat a lot of it too! We had a website which had posted some of my recipes, which is being redesigned right now. I thought I’d lost the recipes, but come to find out I did end up making a backup of it! Tofu is such a blank slate that really, a lot of creative possibilities exist. Here are a few of my favorite recipes I’ve developed over the years of dressing up tofu. Really, any kind of sauce could be put on it after baking it for 15-20 minutes, sliced or cubed. Honey-mustard, BBQ, marinara, pesto, spicy peanut, orange glaze…

img_0747

Honey-Walnut Tofu

tofu, plain extra-firm, 1 Lb
oil for baking, about 2 Tb
coconut milk, half a can (shaken)
honey, half cup
lemon juice, 2 tsp
water, 3/4 cup
canola oil (gmo-free if possible), 1 Tb
salad mustard, 2 tsp
fresh ginger, 1 tsp grated
salt to taste, quarter tsp perhaps
cornstarch, 2 Tb
walnuts, half cup

Cut the tofu into bite-size pieces, such as cubes or triangles, about a half inch thick. Toss the tofu pieces in oil to coat them. Spread evenly on a baking sheet and bake at 350 F for 15-20 minutes, until golden and crispy on the outside, but still moist and chewy inside. Toast the walnuts in a cast-iron skillet, no oil, on medium-high heat. Stir them frequently for 5-10 minutes, until they are browned and aromatic, and set them aside. To make the sauce: in a small bowl, whisk the cornstarch with 4 Tb of the water til smooth, and set aside. In a separate sauce pot, combine the coconut milk, honey, lemon, remaining water, oil, mustard, ginger, and salt. Heat on medium-high heat to a low simmer. Whisk the cornstarch liquid into the rest of the sauce. Continue whisking until the sauce thickens slightly (about 1 minute), then remove from heat. Stir together the baked tofu, walnuts, and sauce. Let stand for a few minutes to allow the tofu to absorb some of the sauce. Serve over rice, best with white basmati cooked with a little shredded coconut.

creamytofusoup

Cardamom Cream Tofu Soup (similar to the Thai Tom Kha soup)

serves 4

1 lb. tofu, plain extra firm
1 quart whole dairy milk (or almond milk)
1 can coconut milk
1 cup water
1 Tbsp butter
1 tsp salt, or to taste
1 tsp cardamom seeds
1 tsp coriander seeds
1 dash fresh-ground black pepper
a few sprigs of fresh parsley, chopped

Cut the tofu into 1-inch cubes. Toss all other ingredients (except the parsley) into a soup pot, and heat until just below a simmer. Do not allow to boil. Add tofu cubes and heat on low, 15 minutes. Before serving, sprinkle fresh parsley on top.

img_1348

Mu Shu Tofu

Vegan, gluten-free

serves 4-6

1 lb. tofu, plain extra firm
1 head of cabbage
2 carrots
half an onion
5 florets of broccoli
4 oz baby bella mushrooms
4 oz woodear mushrooms (optional)
2 tsp fresh grated ginger
3 Tbsp non-GMO canola oil
approx. dozen mu shu pancakes, or flour tortillas
1 jar of plum sauce, or make your own, recipe follows

Shred the tofu by hand using a grater. A mandolin is perfect for slicing the cabbage, carrots, onion, and broccoli very thinly, but if you don’t have one, either grate them or slice super thin. Slice the mushrooms thinly too.

Heat the oil in a pan or wok. Add all the veggies, tofu, and ginger and stirfry until quite soft. Gently warm the tortillas. Serve the stirfy inside a wrap with plenty of plum sauce.

Homemade Plum Sauce

1 cup dried prunes (fresh can be used too, if flavorful enough – taste first)
2 cups water
half cup soy sauce
half cup molasses
2 tsp red wine vinegar
1 tsp dried ginger, to taste

Boil the prunes in the water until very soft, about 15 minutes. They should be mushy and plump. Let cool slightly, then place plums and their juice in a blender or food processor. Add all other ingredients, and puree until smooth.

Turnip Recipes

20151019_131941

Here’s a photo I took of some of the lovely turnip greens that our garden grows. For more about our farm’s vegetable production, check out our garden manager’s blog, Sustainable Market Farming: Intensive Vegetable Production on a Few Acres. Pam published a book about her experiences growing food for our community. It’s interesting to read about the gardening aspect of the veggies I’m cooking with!

It took me about a month to realize that my previous post, Rutabagas & Turnips, was a love letter about Rutabagas that actually didn’t include any turnip-specific recipes! But the last few weeks the garden has been harvesting lovely turnips & turnip greens, so I’ve remembered a few of my favorite turnip recipes.

I can understand that turnips are an acquired taste (somewhat unpopular, bitter to some), but for me they have a fascinating, curious, slightly variable earthy taste that bounces around my palate between bitter and sweet. On the taste bud palate of the tongue, sweet and bitter are on opposite ends. Highlighting those flavors with sour, salty, or umami can tie the flavor together and balance out the bitterness.

Turnips Roasted to Perfection

Wash your turnips, trim off the ends, and chop them into 1-inch cubish pieces. Mature (larger) turnips might have a thick skin to peel off like rutabagas, while younger (smaller) turnips are tender and thin-skinned enough to not need peeling. Toss the turnip cubes with a light drizzle of oil, salt & pepper. Place in a single layer on a greased baking sheet pan, and roast in a 350-degree oven for about 25-35 minutes. There is an ideal level of doneness to watch for, when the turnips have softened on the inside, and caramelized & browned on the outside, before they’re burnt, that creates such a heavenly flavor!

Sauteed Turnips with their greens

Another classic way to serve turnips well is to combine them with turnip greens, if you can find them still attached, or otherwise fresh. Turnip greens by themselves have a strong bitter taste that, at least to me, is not unpleasant, but sharp – a bit like arugula, a radish-y flavor.

Trim the greens, wash thoroughly, and chop into 1-inch strips. Wash the turnip roots, trim off the ends, and chop into half-inch cubes. Heat a skillet, drizzle a bit of oil first and then add the turnip root chunks. They’ll need substantially longer to cook than the greens, so give them a 10 minute head start. Cover the skillet for a couple of minutes to help steam-cook and soften the turnips, stirring occasionally. When the turnip cubes are mostly softened and starting to brown slightly, add in salt & pepper, and then the greens. Saute, stirring, until the greens have softened, about 3 minutes (if they’re taking a while to soften, add a couple spoonfuls of water into the pan and cover for a minute). I like the greens to still have plenty of green color, effectively garnishing their white root. To give this dish some extra flavor, I recommend adding a sprinkle of lemon juice (or red wine, but not both) to the skillet towards the end of cooking.

Boiled turnips with fresh lemon & cilantro

Wash and chop turnips (either cubes or slices would do). Place them in a pot with water an inch higher than the level of the turnips. Boil until tender but not mushy, testing with a fork, and drain. Wash & chop one bunch of cilantro. Zest a fresh lemon, and squeeze the fresh juice over the turnips. Add salt & pepper, a drizzle of olive oil, & the chopped cilantro, & mix. The lemon & cilantro add a great kick to compliment the kick of the turnip’s taste.

Deep-fried Turnip slices

When in doubt, deep-fry it. I really like how deep-frying changes and softens the flavor of turnips. They’re especially good dipped in soy sauce with a couple slices of ginger root.

Use your favorite batter – I usually do a light, tempura-like batter with flour & cornstarch. Dip very thin slices of turnip into batter, letting some excess batter drip off. Drop into hot oil to cook for about 5-10 minutes, until the crust is crisp and golden and the turnip has softened.

A note about deep-frying setup: make sure it’s safe – as in, use a pan with at least 4 inches of height in case of splatter etc. Don’t over-fill with oil – you only need about 2-3 inches of oil to fry in, maximum. Use an oil with a higher smoke point, like canola, peanut, safflower, or (heaven forbid) lard. Pre-heat the oil on medium-high (you may need to turn down later if it’s smoking a lot). Keep an eye on the oil, and test the heat by placing your hand about two inches above the oil – when it starts to get uncomfortably hot, test the oil with a drop of batter – does the batter just sink sadly (not ready), or does it quickly sizzle and float? When you believe the oil’s ready, drop a tester slice in and see how it does. When it cools, taste it, and modify your methods as needed.

Pretty Salads Gallery

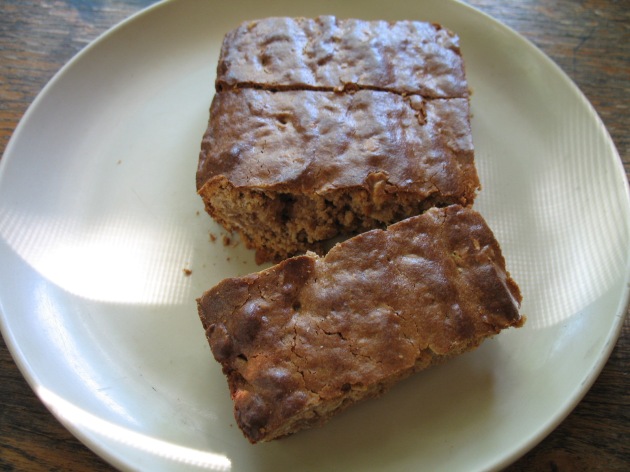
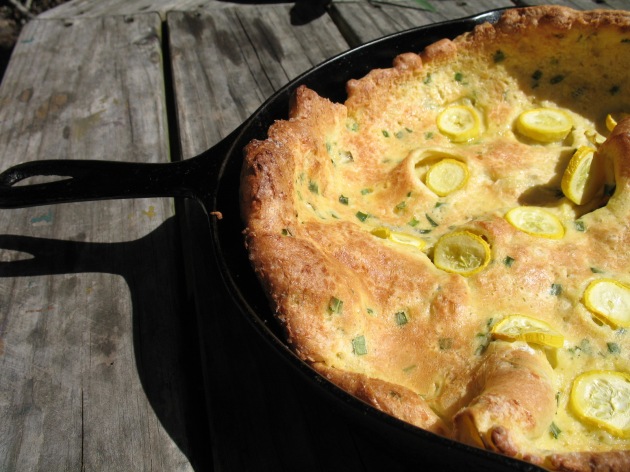
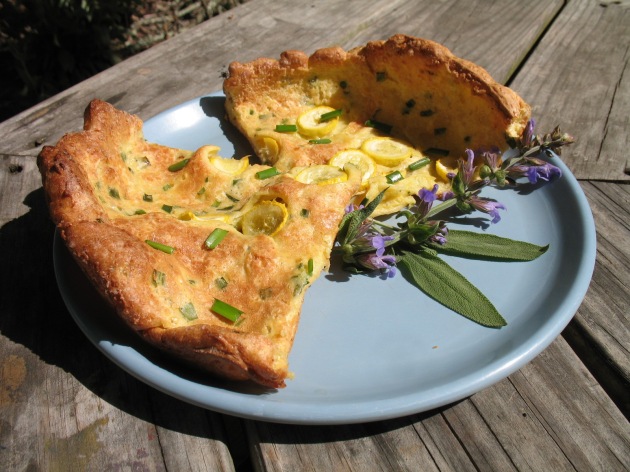
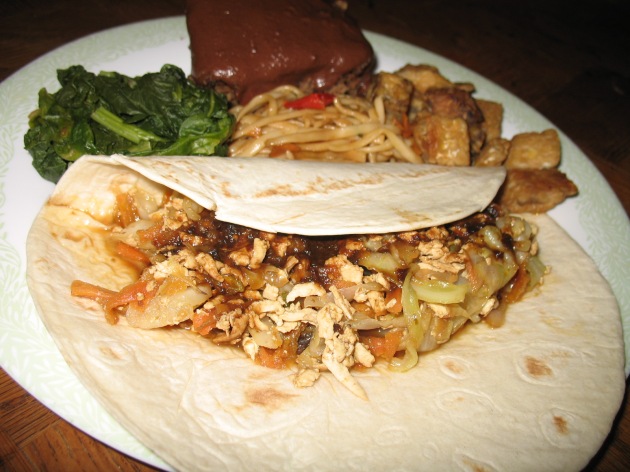
There’s nothing like a fresh salad to spruce up a table. A pretty salad can effectively garnish the whole meal. A variety of colors in salads can increase appetite, as well as providing basic fiber and raw nutrients. A medium-dark lettuce carries whopping amounts of chlorophyll; vitamins A, C, & K; manganese; folate; and more. It’s also an opportunity to add some Omega-rich healthy oil – such as extra-virgin olive oil, walnuts, or another favorite nut. Salads are fun to make here on the farm, with a full supply of super-fresh homegrown greens, herbs, edible flowers, cukes, tomatoes, and more. Sadly, cold weather is here for a few months slowing that supply down a bit. Cooler weather is actually best for growing lettuce, flavor-wise – in hot weather the flavor can turn bitter if the plant bolts or “burns.” Our farm continues to grow lettuce, kale, and other greens in the hoophouse all winter long. It’s easy to make up new salad recipes using whatever veggies look best in season. Here are a few of my favorites from the past couple of years:

Quick-pickled Radishes

This is such a simple recipe – and can be colorful, if you choose colorful radishes. Our farm grows a lovely mix of purple, pink, red, and white radishes.

20150305_104824

Slice very thinly, then sprinkle salt to taste and vinegar to the top level of the radishes in a bowl. Add fresh cilantro leaves, and mix well. This salad is great right away, and even better after at least a half hour of soaking. For community meals, I usually make a couple of quarts of this salad when we have enough radishes! Here’s a basic ratio for smaller proportions:

1/2 cup thinly sliced radishes, 3 Tablespoons Vinegar, 1 teaspoon salt.

I have come across many interesting variations in recipes for quick pickles, so experiment with adding things you might like in the basic recipe, like horseradish, sugar, garlic, ginger, herbs, thinly sliced carrots or other crispy veggies.

1914556_1200445342065_3942178_n

Apple Rhubarb Flower Salad

10155403_10203596069773106_3516256931586692293_n

Some folks shy away from edible flowers, or don’t know which ones are edible. Some common back yard varieties include daylilies, violets, borage, squash flowers, nasturtium, roses, redbuds, etc. Caution is advised for unfamiliars, naturally. Edible flowers have been in food fashion for centuries, with a recent jump in popularity the past decade or so. A friend of a friend started their own edible flower business for a couple of years, simply growing what they could in their back yard, selling to the back doors of restaurant kitchens who received them with pleasant surprise. Flowers are wonderful cake toppers – seven years ago, I made a simple handfasting cake with pale yellow & pink rose petals & violets for a couple of old-fashioned friends’ special day.

This salad uses purple & white violets, plus their greens, picked fresh the day of use. Thick, reddish rhubarb stalks are best in season in the spring. Slice the rhubarb thinly, discarding the leaf (which is poisonous). Core your favorite apples (for this salad, I like the sweetness and flavor of gala or fuji), and chop into 1-inch chunks, sprinkling lemon juice as you go to prevent oxidation. Proportionally, use about 4 parts apples to one part rhubarb. The tartness of the rhubarb contrasts nicely with the sweetness of the apples. Add the violet leaves whole, or slice them. Add a drizzle of honey, a splash more lemon (to taste), sliced fresh sorrel (if you have it – a lemony leafy herb) or parsley or chervil. Mix well, and top with pretty violets right before serving (they might wilt in the fridge or heat).

10174996_10203596068013062_6478521981717964980_n

Cucumber, Apple, & Pear salad

Peeling is optional if you trust where your produce came from. Thinly slice equal amounts of cucumbers, apples, & pears (asian pears are especially well-suited with their juicy, crispy, mild flavor). Wash & mince a handful of fresh parsley. Add a splash of rice wine vinegar or fresh lemon, a light drizzle of honey, light sprinkle of salt, and mix well. Our farm grows small, yellow “asian jewel” melons that taste like a slightly sweet cucumber – also a great addition to this salad.

Massaged Kale

Kale, whether massaged, cooked, or in chip form, is definitely “in fashion” lately. As a dark, leafy green, kale provides vitamins, iron, & potassium. Massaging kale softens it while leaving it raw and its nutrients intact.

Wash kale, and strip from the stems (pulling the leaves off with your hands), or chop finely (1-inch leaf pieces, plus thinner sliced stems optional). Mince a couple cloves of garlic, and sprinkle with some salt & pepper to taste, a splash each of lemon juice & apple cider (or white wine) vinegar, plus a generous drizzle of extra-virgin olive oil. With clean hands, roll up your sleeves and massage the kale as you might a person or bread dough. Turn & mix while massaging for about 15 minutes, until the kale had decreased in size by about half. Sometimes I won’t have enough room in the bowl to massage it all at once, but then I can add more kale in once there is room for more to fit.

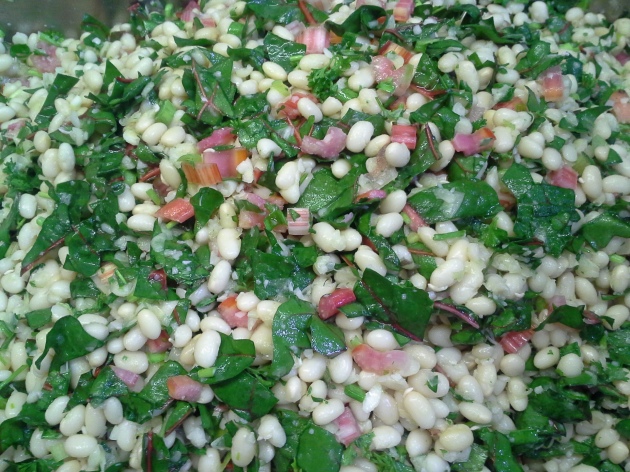
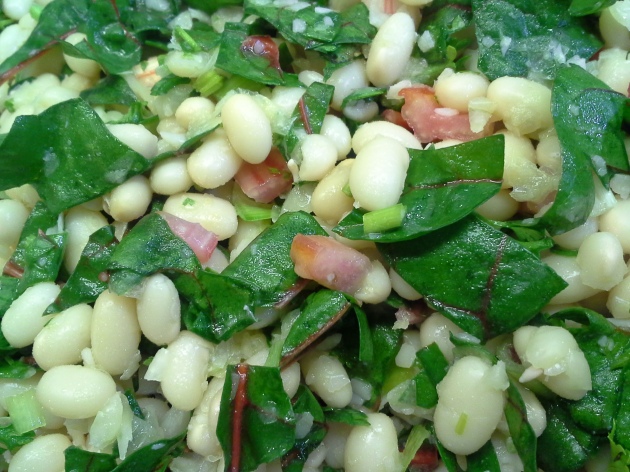
Mixed Greens & Purples with Feta

20151028_151407

Purple & blue veggies & flowers are uncommon in nature. Purple vegetables contain antioxidants, a wide variety of vitamins in trace amounts, plus plenty of vitamins A, B-6, C, and potassium. They’re best served raw, with some kind of acidic element (lemon, vinegar, etc) to protect it from oxidation, for the most nutrients and health benefits.

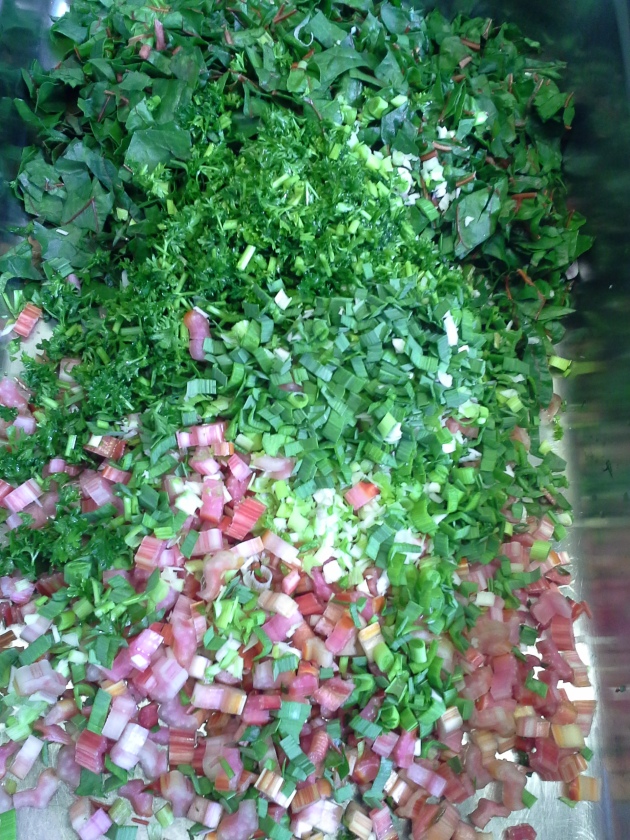
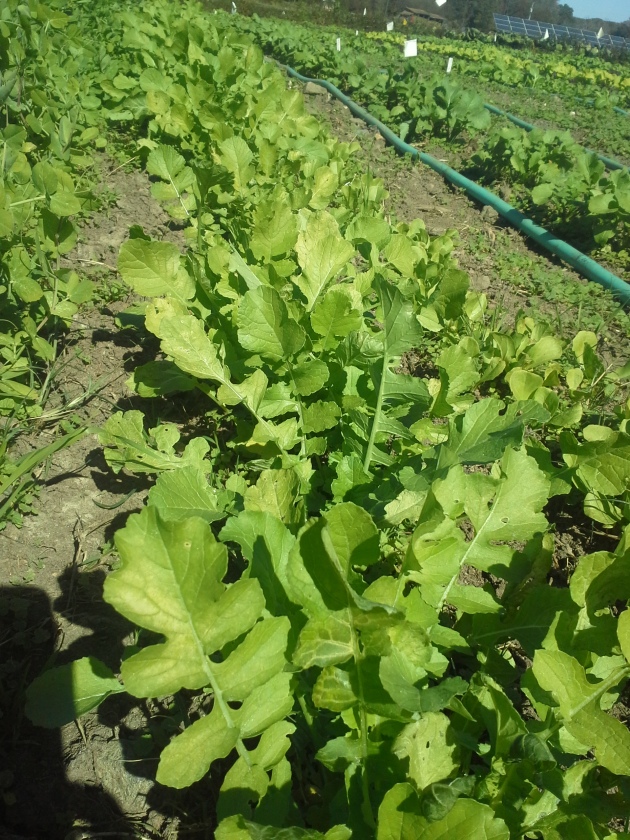
Wash & dry baby spinach greens, or your favorite dark leafy greens (pictured above is tat soi & radish greens). Thinly slice a purple cabbage and a red onion. Toss salad with a sprinkle of coarse salt, black pepper, oregano, olive oil, and fresh lemon juice. Crumble feta cheese and fresh black olives and mix.

Tomato Salad with Basil & Tarragon

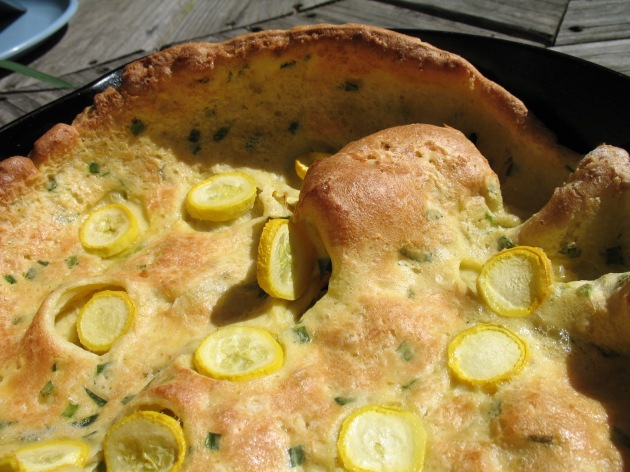
I love a mix of colors of tomatoes (Verna orange, yellow peach, big rainbow, burgundy, green zebra heritage varieties are some of my favorites), and of course any fresh red tomatoes will work. Cube the tomatoes or slice how you like. Roughly chop (or rip by hand) fresh herbs: basil, tarragon (goes surprisingly very well with tomato flavor – naturally sweet), oregano, plus salt & pepper to taste (I use sparse, coarse salt and fresh cracked black pepper), and mix. This salad could easily be sliced instead, showing the prettiest sides of the tomatoes’ colors – and then spread over some focaccia flatbread and baked. Yum!

For more texture, flavor, and protein, add fresh mozzarella cubes and sliced red onion & let marinade for a while before serving.

Wild-Harvested Salads

Like edible flowers, more back yard salad may be eluding you. Get a trail guide or plant identification book, or a neighbor, and start looking. Knowing at least a few common wild edibles provides fresh meals while camping in wilderness, and variety of diet while back home. Never be without nutritious, dark ruffage (also spelled roughage). Some common plants to look for and taste:

-chickweed (grows most of the year in medium climates)
-purslane (juicy, lemony flavor, omega 3)
-dandelion leaves (& flowers) – bitter, coffee taste, good for liver
-wild onions (easy to find shooting up above the top of the grass, almost anywhere)
-watercress (grows in or near streams)
-nettles (high-nutrient density, great for your organs)

20151009_145706

Green Goddess Dressing

This is a favorite dressing which can take different forms. Everyone makes it slightly different to their own taste, but the basics are to chop up lots of green things and puree into a dressing – spinach, kale, parsley, cilantro, scallions, etc. I start with a jar and fill it half to two-thirds full of chopped green ruffage, pour vinegar about halfway, add a scoop of yogurt, a scoop of tahini, salt & pepper to taste, and olive oil to fill, then puree using an immersion or standing blender.

Rutabagas & Turnips

Rutabaga_à_collet_vert_Vilmorin-Andrieux_1883

Growing up in Vermont, I’m no stranger to turnips and their sweeter, yellower counterpart, rutabagas. They could practically be the State Vegetable. They are a great winter storage crop which generations of Vermonters have relied upon to bring them through the long winters. There is an annual festival for the gilfeather turnip, which is a relative of rutabaga, almost a hybrid. People “turn up” by the hundreds in the chilly autumn air…

turnipfestival

Yes, those turnips in the foreground are bigger than the heads of the women in the background.

Rutabagas are a great source of vitamins C & B-6, potassium, calcium, magnesium, and iron. Turnips have slightly smaller amounts of the same nutrients. Earthy and sweet with a distinct radish-like bite, I can understand that it’s an acquired taste. But for me it’s a fondly familiar, comforting presence at fall & winter harvest meals like Thanksgiving.

But for most of the rest of the country, as our great First Lady Michelle Obama once said, “Turnip what?!” After moving south to Virginia, I naively realized that I was not in “Kansas” anymore. Turnips were that bitter vegetable used only as a last resort. People argue that there’s no difference between turnips and rutabagas! Blasphemy! Rutabagas were nere to be found, a rat-tailed shadow of its full body grown up north, a true cold-weather crop. Even in supermarkets, I’ve never been able to find a rutabaga bigger than a softball; almost unrecognizable to someone used to them being football, or even volleyball sized, covered in a thick layer of wax.

The wax is not the only part needing peeling – the tough, woody skin is usually about a millimeter thick. Pare it clean off, watching for any remaining woody bits, and rinse. First attack it in half, for easier handling of the large rocky vegetable.

rutabaga

Mashed Rutabaga with Maple

Cut into strips, then into half-inch cubes. Place in a pot with water to cover, and boil until very tender, about half an hour to an hour. Drain the water, and add pats of butter to melt on the cubes. Mash with a drizzle of real maple syrup, salt, & fresh-cracked black pepper.

Rutabaga fries

Cut into french fry sized strips, toss with oil & salt, bake at 350 until crispy on the outside, and soft on the inside, about 40 minutes.

A few years ago when I used to home-brew wines, I made some rutabaga mead using the cooking water, honey, and champagne yeast. The smell was… pungent. Let’s just say that it could not be kept in the house for more than two days while brewing. It was banished to the basement for a year after the smelly fermentation stage was over. I rediscovered it almost accidentally, having banished the memory of the smell from my brain as well. “Oh no, this,” I thought, having flashbacks to the dreaded stink. But I was pleasantly surprised that the smell had mostly vanished, leaving a more beer-like smell. After racking it for another month, it tasted like a vodka made from rutabagas instead of potatoes (so, weird, but strong). A fun experiment, but not one that I recommend.

Soup Sequel

Cream of Anything Soup

To make a cream base for whatever kind of cream soup you’re planning, start by sauteeing a diced onion and couple diced cloves of garlic in some butter or oil. Once they’re soft, add milk to fill the pan with some room left for veggies, plus salt and pepper to taste. If you can, use a ratio of three parts whole milk to one part cream. If you want a lower fat version, skim milk can be used instead of cream. Warm the milk on medium-low, stirring often.

Now for the fun part: which vegetables do you have around that are worthy of this solo? My favorites are asparagus, broccoli (with shredded cheddar), mushrooms, roasted garlic & squash, celery, or greens. Whatever vegetable(s) are the filling to this cream soup, it’s best to mostly pre-cook them in a bit of water or sautee before adding them to the cream pot. To prevent burning, this soup doesn’t get boiled much – so veggies won’t cook fully on their own.

Stir a bit of cornstarch with some cold milk in a separate small bowl, using a whisk to break up any clumps. Once the soup is near boiling (steaming, not quite yet rolling), pour the cornstarch mixture into the soup while whisking the soup constantly for a few minutes to prevent clumps and sticking to the bottom. The soup should thicken within a few minutes as the soup starts to simmer. Now, taste: does it need more salt, or anything else? Serve with a hearty bread – cream soup is great for dipping!

Chowder comes in many forms, varying by region across New England. Manhattan style chowder is a tomato-based variety. But what most people think of as “chowdah” is creamy, chunky, and if you’re in Maine, most definitely contains a sea of fresh clams, mussels, lobster, or white fish. Here on the farm in Virginia, in the absence of such luxuries, chowder comes in the form of fresh farm veggies like corn and summer squash, potatoes, chard, and sometimes savory woodland treats like wild mushrooms (chicken-of-the-woods, shiitake, oyster). Sautee all veggies in the bottom of the chowdah pot with a couple of bay leaves & some thyme, add the potato cubes & corn and just enough water to cover, and pre-boil til tender. Pour in the cream & milk, bring nearly to a boil, add the cornstarch mixture to thicken. Serve with oyster crackers and bread.

Borscht

Borscht is fun to say and nutritious! There are many ways to make borscht, with different styles ranging from chunky to smooth; vegan or with beef stock; hot or cold; sweet, sour, or savory; raw or slow-cooked; from Poland to Turkey to Russia to California. Start with fresh beets and dill, and go by what you like from there. Here is my personal favorite borscht:

Chop beets into small cubes. Chop half a cabbage into 1-inch pieces. Slice and caramelize onions, then add cabbage and two bay leaves and saute til soft with a bit of olive oil (or butter). Add beets and beef broth, plus some crushed tomatoes, a pinch of dill & tarragon, splash of vinegar, salt and pepper to taste. Boil until beets & cabbage start to fall apart, about an hour & half. Ladle into bowls, scoop a generous dollop of sour cream on top, and garnish with more dill.

To make a Thai-flavored Borscht, use handfuls of fresh cilantro instead of dill. Round off the flavor with a sprinkle of cardamom, fresh lime, and coconut milk. Add chilies if you dare.

For a smooth, vegan, naturally sweeter version of Borscht, boil peeled beet chunks in water with a pinch of dill & tarragon & mint. Optionally, add some pear chunks for more sweetness! Add a dollop of olive oil, minimal salt, pepper, and puree the soup using either a blender, food processor, or immersion blender. Chill until cold, and serve with more fresh dill, tarragon, & mint on top.

What if you don’t have all day to make a soup? Try Soup-in-a-Jar!

This soup takes less than half an hour to make, and if you’re on the go, only needs boiling water added. I make up a few jars ahead of time so they’re ready to go. I take a quart jar and fill it with thin rice noodles, spices (ginger, turmeric, pepper, salt, oregano, thyme, garlic powder), a spoonful of nutritional yeast, a spoonful of sesame oil or olive oil, plus dried seaweed and dried mushrooms. Cover with boiling water, replace lid and gently shake, and let sit for about 20 minutes until the soup is ready to eat.